

QUIXX Scratch Remover: Do-it-yourself
So you’ve just taken your prized thoroughbred out to stretch its legs and the unthinkable happened. You got a big, nasty scrape in the paint. Unfortunately I know that sickening feeling all too well. In the past this meant a trip to the auto body shop. Now there is an alternative. Read on…
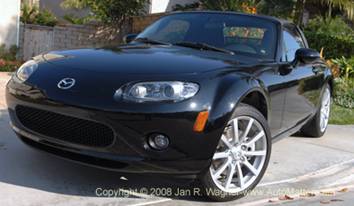
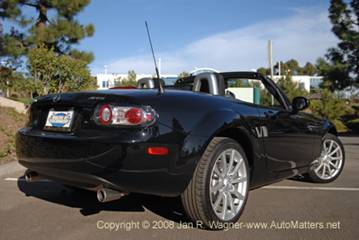
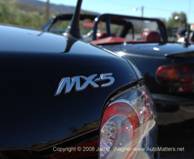
All week I keep my shiny, black Mazda Miata (I’m sorry, but I just can’t call it an MX-5 even if Mazda, in its infinite wisdom, wants us to) in its garage to protect it from the inevitable bumps and bruises of daily driving. I use my trusty Toyota Prius for that duty. I save my Miata for special occasions.
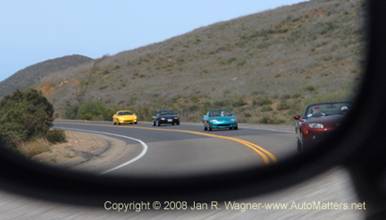
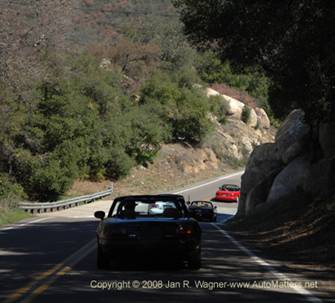
Sometimes those occasions are relaxing drives on gently rolling, scenic country roads, or perhaps along the Del Mar coastline at night, top down and heater up so that I can listen to and enjoy the waves crashing on the shore. Those drives really do clear out the cobwebs and I truly feel invigorated by the time I return home.
Other times I turn to autocrossing to clear out those cobwebs. There’s nothing quite like having to focus 100% of my attention on something – in this case driving at the limit of my ability to control my car, to forget about everything else that I do in my day-to-day life.
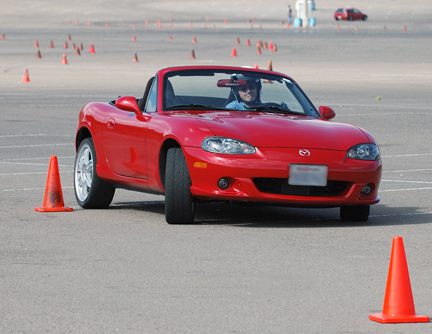
So it was that on Sunday I drove to Qualcomm Stadium to enter an SCCA autocross. This year my class is especially large, yet extremely competitive. We are all on true street tires, as opposed to (barely) street-legal gumballs. At least in my case and, I suspect, others’ too, I made the move to this class to save money.
I can’t justify the expense of going through several sets of expensive Hoosier tires in a season, just to win bragging rights and a cheap trophy. My new, much harder Bridgestone street tires should easily last for at least a full season of autocrossing, and perhaps more. Also, I no longer need to change to another set of wheels and tires between events in order to safely drive my Miata around town and on the other type of cobweb-clearing trips.
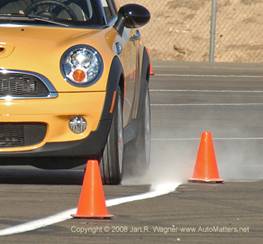
The problem with using street tires as autocross tires is that they are not nearly as sticky as Hoosiers. A car on street tires, when pushed to the limit (and beyond), tends to slip and slide a lot more. We’re talking about every turn, as well as on hard applications of the brake and throttle.
Don’t get me wrong. There’s nothing inherently bad about this condition if you drive accordingly. It’s like driving in the rain. You can safely do so as long as you drive according to the conditions. Autocrossing on street tires is thrilling and helps to prepare you quite well for emergency situations that you might someday encounter on the street. It can actually be lots of fun, too, but there is most certainly a reduction in what the driver can physically do to maintain control – or recover it once it is lost. As compared to driving on super-sticky tires, there is a significantly reduced threshold beyond which the driver becomes a passenger and what will happen happens. I discovered that threshold last Sunday.
Remember when I was telling you that my new class is very large and competitive? Of the more than 20 drivers in my class, most turn in times within a couple of seconds of everyone else’s, if not less. You read right. To be exact, there were 22 entries in my class this day. Of those, the best time (indexed, to compensate for base class differences) of each of 12 of the 22 competitors, ranged between 48.473 and 49.537 seconds. That’s a difference of only 1.064 seconds for over half of the field! As you can see, the difference between placing near the front of the pack or near the rear was literally measured in not just tenths but thousandths of a second. Whew! To do well in this hyper-competitive class, drivers really need to get almost completely out of their comfort zone and go for it. There is very little, if any, margin for error.
So it was that part-way through my second run of the day I decided to go for broke. I had negotiated almost the entire course and my run felt especially quick. I was repeatedly on this side of the fine edge of losing control. My glistening, black Miata was screaming along in second gear at full, glorious song, the tires screaming in protest as they ever-so-slightly broke traction at each and every tight turn. This was the sort of run that I dream of.
Finally, all that remained was one turn – a somewhat tight right-hander which led to the finish line. Victory, or at least placing near the top of my class, seemed to be securely in my grasp. Yes! Well, actually, no. You can probably guess what happened next.
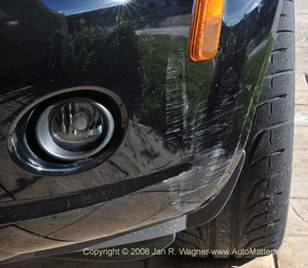
I entered that fateful turn just a teeny, tiny bit too quickly. As my front tires gave up too much of their precious, tenuous grip on the track, they allowed my pristine Miata to slide a little bit too wide – right into one, then two and finally three of those stupid little orange traffic cones, before I was able to regain control and cross the finish line. Aargh! I rarely hit any cones and yet this time I somehow managed to smack into three of them on one run. The two-seconds-per-cone time penalty meant that I had totally blown this championship run and, as it turned out by my fourth run, my day: with a best time of 49.070 seconds, I placed 16th out of 22. However, as you will see, that was far from the worst consequence of my second run adrenaline rush.


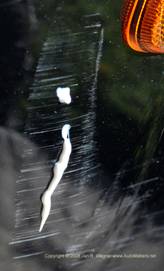
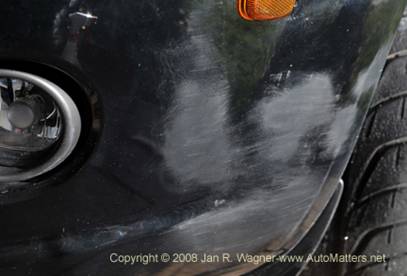
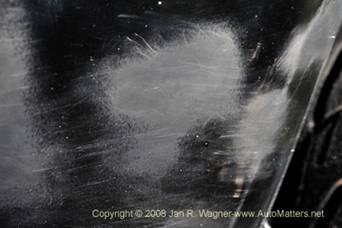
Those traffic cones are relatively soft and flexible. If a car gently bumps into one while moving at a crawl and then stops, that car should be none the worse for wear. However, that is not at all what my car did. To make things even worse, my Miata was a little bit dusty. Dust is gritty.

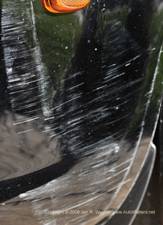
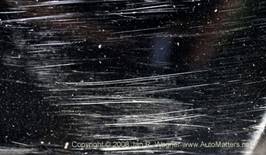
Combine grit with three good, solid whacks and, well, the consequences were ugly.
Later, as I dejectedly drove home, I remembered a car care product that I had seen at the SEMA Show in Las Vegas. I’d taken a sample for evaluation and was saving it for just the right opportunity. Perhaps this was it.
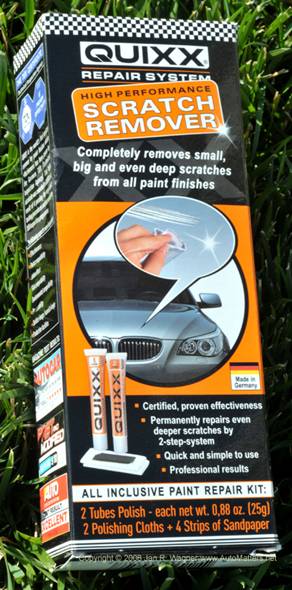
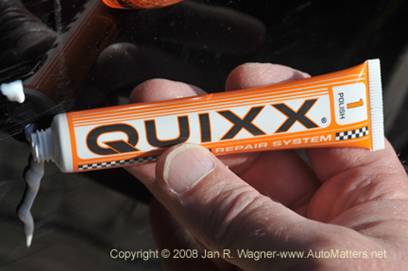
This environmentally friendly product is called QUIXX Repair System High Performance SCRATCH REMOVER (try saying that quickly). The text on the box proudly proclaims that it “completely removes small, big and even deep scratches from all paint finishes.”
It’s from the same country that produces brilliantly engineered vehicles from Mercedes-Benz, BMW and Audi. The press release states that it is “the recipient of the prestigious TÜV (Technical Inspection Agency, www.tuvusa.com) inspection certificate, which is presented to products that pass strict testing procedures.” The brochure cites many favorable test reviews from a variety of publications and media outlets. The Web site states that it is “RATED #1 by Leading Consumer Magazines.” Especially when taken as a group, these seemed to be compelling claims. Perhaps they might have substance and were not, as my good friend the lawyer used to explain to me, advertising “puffery.” I decided to try the QUIXX and find out whether the proud German tradition of engineering excellence extends into this automotive scratch removal product. Otherwise I was going to have to pay a lot of money for repairs.
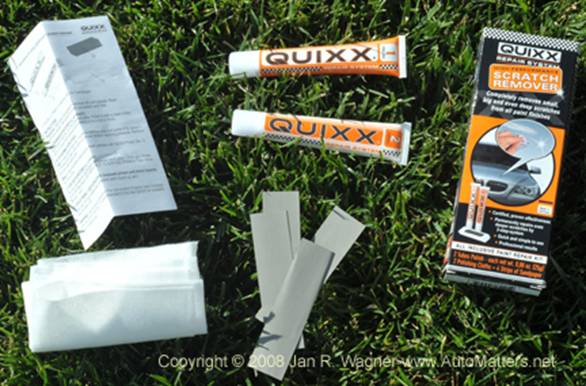
Here is how to use QUIXX Scratch Remover, which sells in stores for less than 20 bucks. Inside the box you’ll find a complete kit. All you will need to add is some water, time and elbow grease (your effort). There is a tube of QUIXX POLISH (No. 1), a tube of QUIXX FINISH (No. 2), application and polishing cloths, four pieces of fine sandpaper (don’t cringe, read on) and, importantly, easy-to-understand instructions.
The first thing that you will need to do is thoroughly wash and dry the area of your car that will be repaired, to remove any dirt and grease. Then you must decide how badly the paint has been damaged. There are instructions for A) minor scratches, B) normal scratches, C) deep scratches (and scrapes) and D) extremely deep scratches (exposed primer and stone impacts). To properly repair these most serious, type D scratches, you will need to buy some touch-up paint, but we’re not going to get into that today.
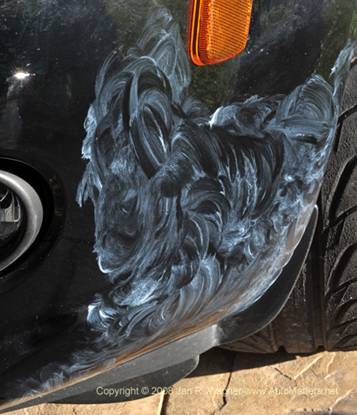
Even though my car’s scratches seemed to fall squarely into the third of the four types, I was initially reluctant to use the sandpaper. Instead, I began by following the instructions for a less serious, type B scratch repair. I was first instructed to apply QUIXX POLISH (tube No. 1) to the scratched area, which I did.
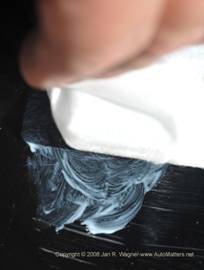

Then I was instructed to polish the area for about one to two minutes with a clean cloth (supplied) in a circular motion, applying pressure. I was trying to repair a fairly large area, so this took me more than a couple of minutes.
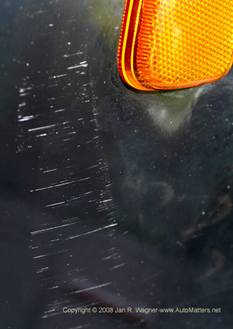
When done, I removed the residue with a damp cloth, dried it and inspected the results. The good news is that it looked a whole lot better. The bad news is that the damage was still pretty easy to spot, even from a distance. I decided that there was no point in proceeding to the next step and applying the contents of the QUIXX FINISH tube. A more aggressive treatment was needed, so I went on to try the instructions for a type C scratch repair.
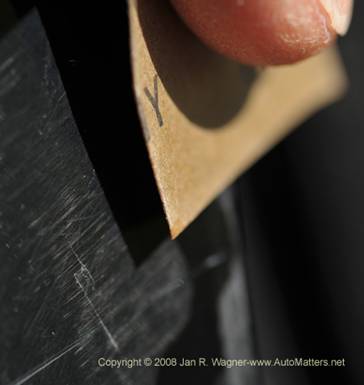
This time I had to begin by wet sanding with a piece of the supplied, very fine sandpaper (3000 grit) and water. The instructions warned: “BE CAREFUL NOT TO EXPOSE PRIMER!”
I must admit to experiencing a sickening feeling as I observed that I was totally killing what was left of the shiny finish of my car’s paint and replacing it with what looked like a hazy mess. Nevertheless, I very carefully continued to wet sand in an attempt to get down closer to the base level of the scratches.
I then washed and dried the area, followed by a reapplication of the QUIXX POLISH (tube No. 1). Once again I rubbed and polished in a circular motion, applying pressure.

This time, as I rinsed off and then dried the area, I breathed a big sigh of relief. Even from close inspection (and I am fussy), most of the scratches had disappeared. Those few that remained were hardly noticeable.
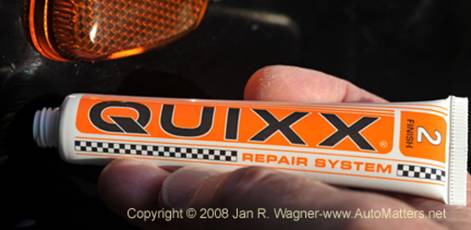
I proceeded to the next and final step, polishing the worked areas with QUIXX FINISH (tube No. 2) to a shiny finish.
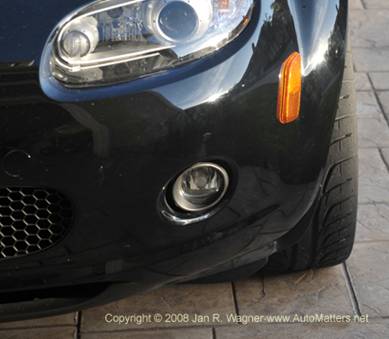
Now, from a reasonable distance away, the car once again looked like new. Thank goodness. The next time I autocross I will more seriously consider protecting especially exposed areas of my car’s paintwork with color-coordinated tape, like some of the other competitors do.
That brings us to the end of another AutoMatters column. To see an interactive demo and learn more about this and other QUIXX products, go to www.quixx.com and click on the “BUY NOW USA” link.