

WHAT IS A JACK NUT? CONSIDER THIS BEFORE WORKING ON YOUR CAR
Even just installing simple accessories can be a daunting task
Having your car work done by professionals can be expensive, but we count on those people to have the tools and expertise to do the work properly. Still, wouldn’t it be nice – at least once in a while – to do simple work on your car by yourself and save that labor cost?
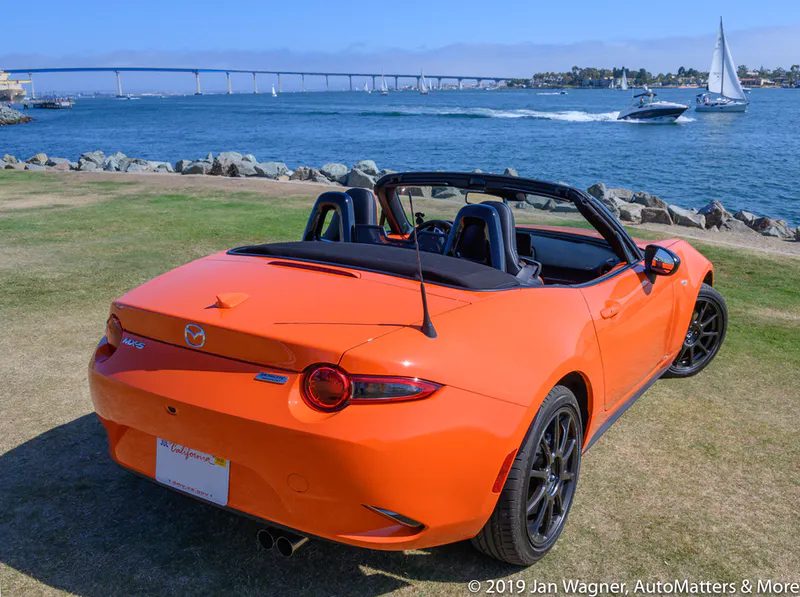
I wanted to protect my brand new, 2019 Mazda MX-5 Miata from rocks, road debris, oil and tar. I’d already had paint protection film installed on the front end and along the rocker panels (see AutoMatters & More #604, entitled “XPEL ULTIMATE PLUS Paint Protection Film & Installation by Auto Armour”), but I wanted to do even more to protect it.
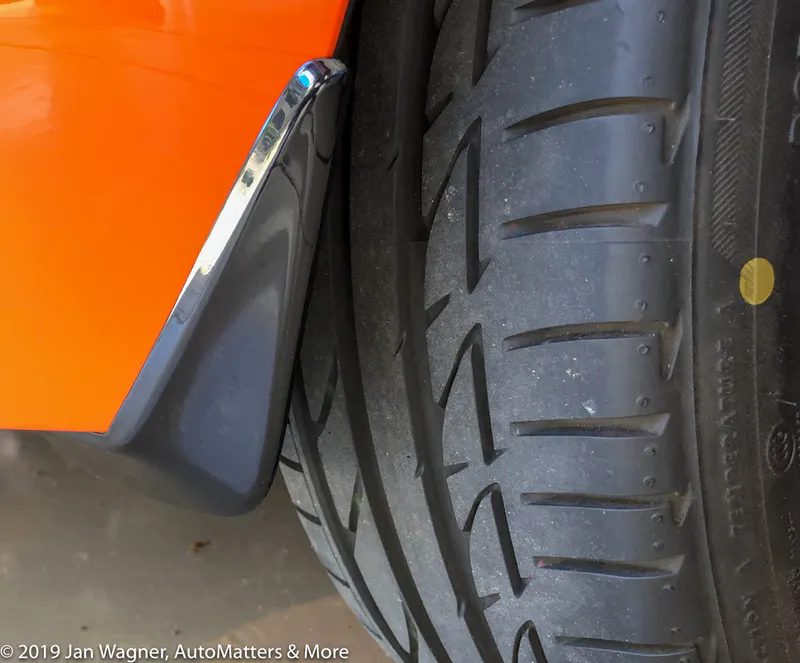
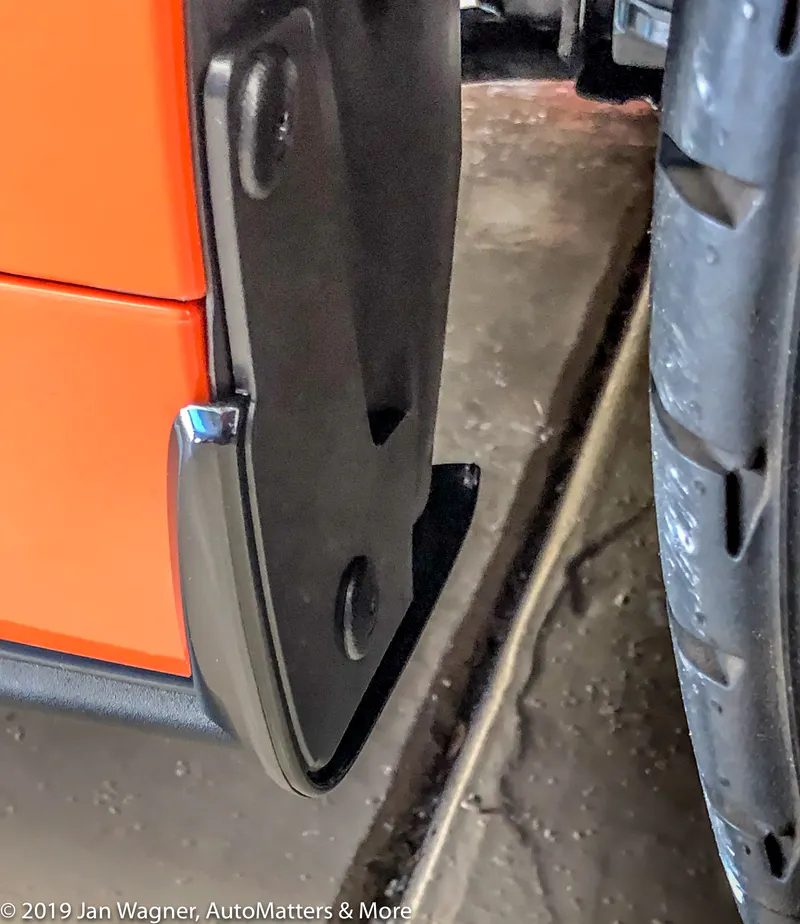
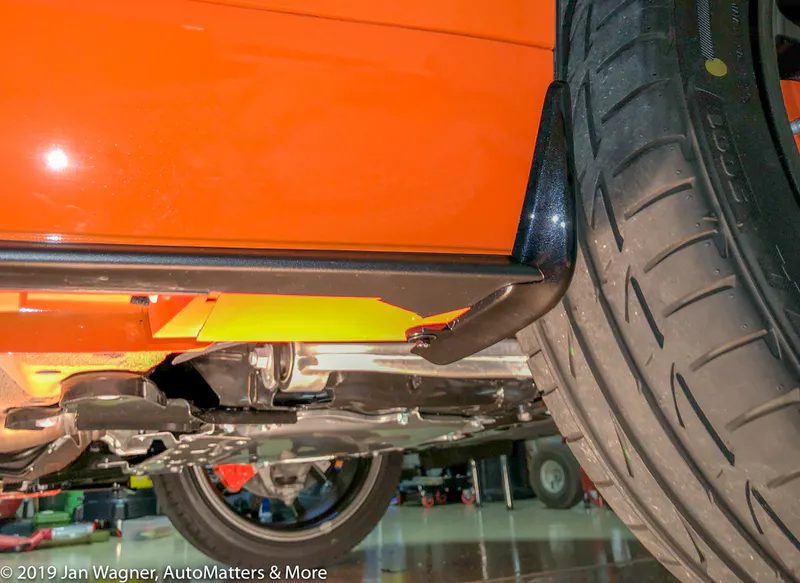
Mazda struck a nice balance between functionality and appearance for their Genuine Mazda Accessory Mud Flaps (“Splash Guards”), saying their purpose is to “protect your paint finish from rocks and other road debris.” These come pre-painted in most Miata body colors, although not in my car’s limited edition color of Racing Orange. Since that color was not offered, I chose the gloss black finish, since my car’s mirrors are black, as is the trim below the rocker panels. The blacks are not the same, but they are close enough.
I learned from Mazda that these mud flaps come with instructions. I thought that installation must surely be very simple, since the mud flaps are so small and simple. I’m fairly handy with mechanical things, so I decided to save the $135 installation charge quoted by my Mazda dealer and do it myself.
When the special-order parts arrived, that was my first opportunity to see their installation instructions. I had assumed that all I would probably need for tools would be a screwdriver, since these mud flaps were specifically designed for my car by Mazda. Oh how wrong that assumption was.
I began the work, which the dealership said should take about two to three hours, mid-afternoon on Labor Day Monday. I figured I’d finish the installation in plenty of time to have dinner afterwards.
There were different instructions for the front and rear mud flaps. The “REQUIRED TOOLS” for the front mud flaps were: drill (3mm, 6mm, 10mm bits), punch, fastener remover, jack nut tool, nippers (vehicles with i-ELOOP only) and utility knife (vehicles with i-ELOOP only). Oh boy! What had I gotten myself into? I needed to try to determine, on a holiday, what i-ELOOP is and does my Miata have it? Extensive Google searches suggested that is not a U.S.-spec Miata feature.
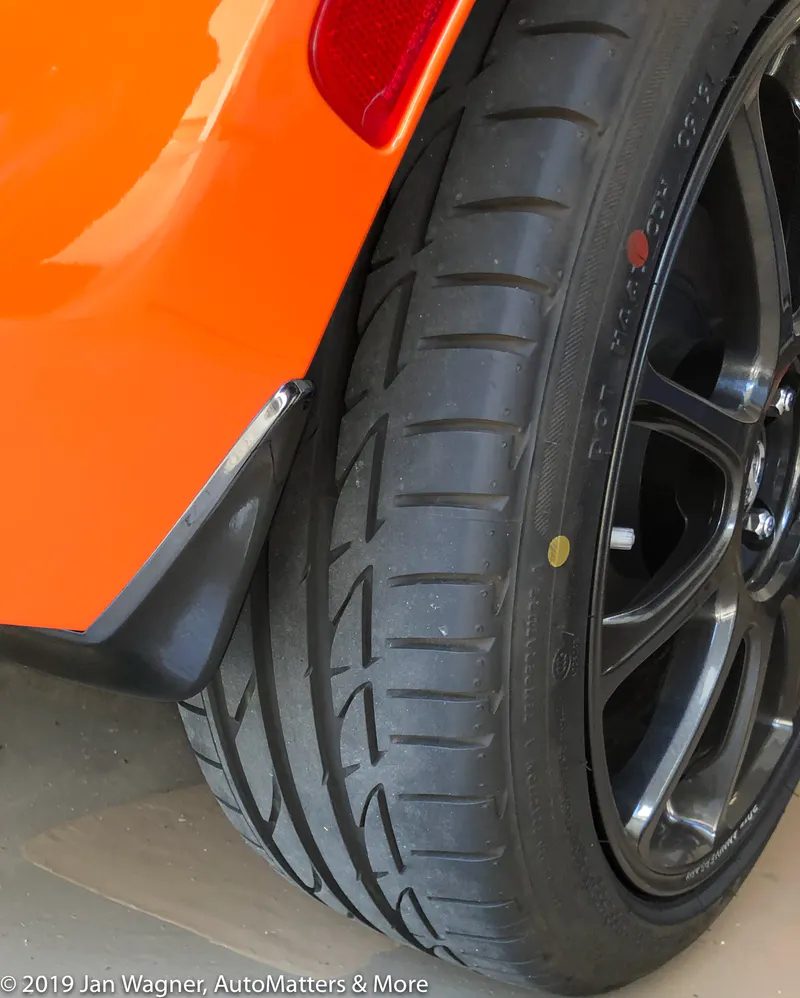
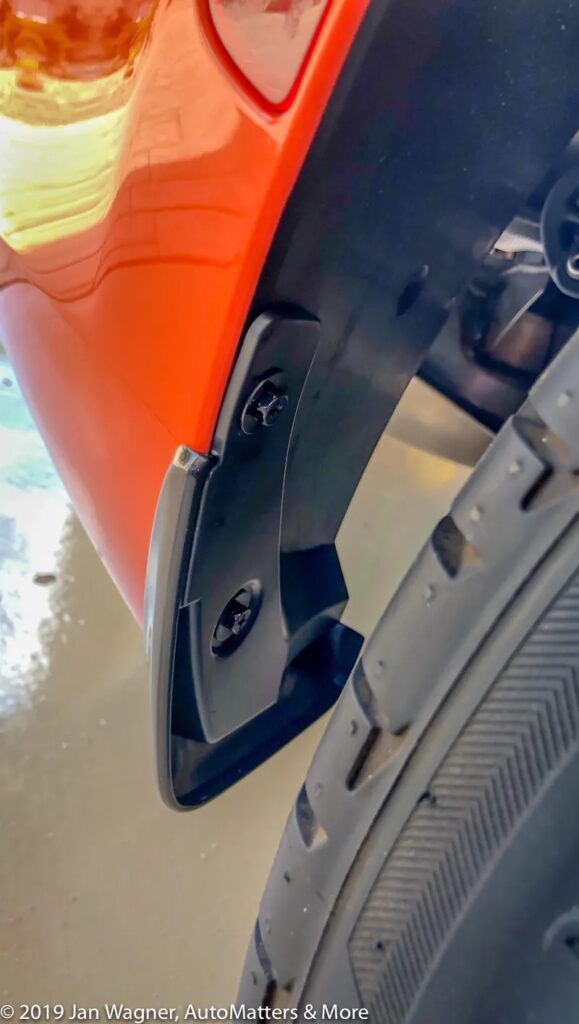
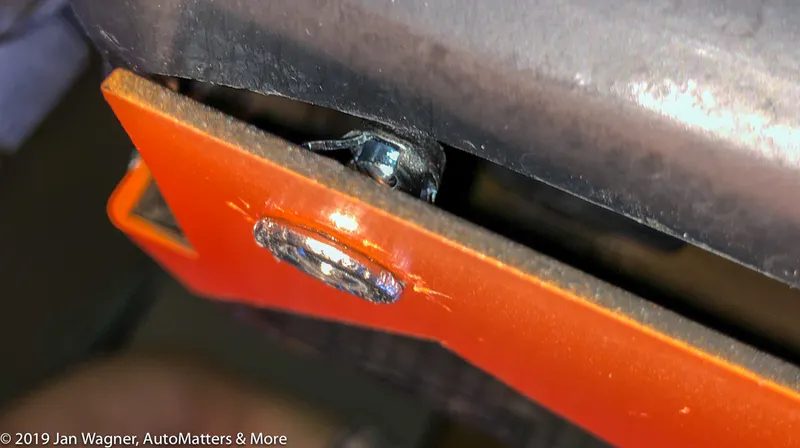
I decided to tackle the rear mud flaps first. The instructions for those looked easier. ‘All’ I had to do was unclip and remove the splash shields from the rear wheel wells (attached with a combination of specialty fasteners and screws), cut out rectangular slots from the splash shields with “nippers,” attach “clip nuts” to the rear bumper, and carefully install each mud flap “while pressing the mud flap against the vehicle so that there are no gaps.” To do all of that I needed to jack each corner of the car up off of the ground to get the tires out of the way, but my Miata did not include a jack!
Eventually with the rears done, I shifted my attention to the fronts. As with the rears, I needed to jack up the car – but this time high enough to fit a power drill underneath.

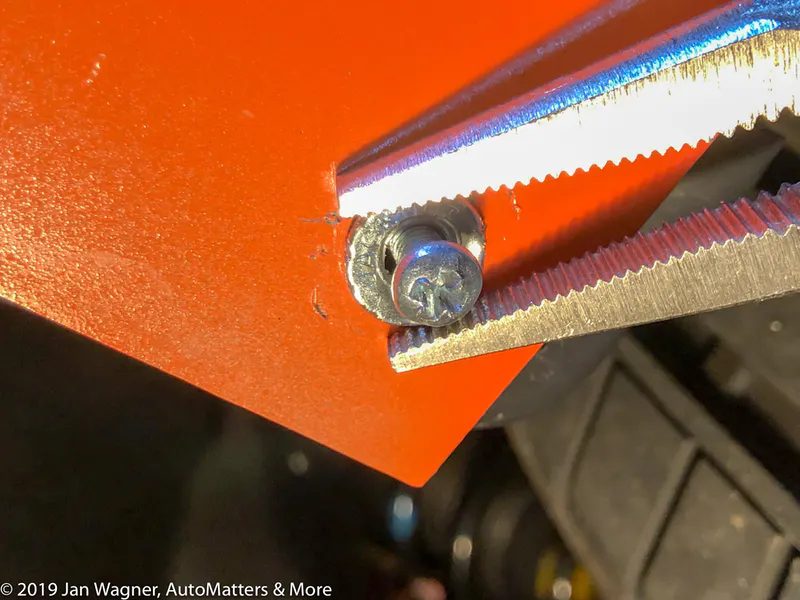
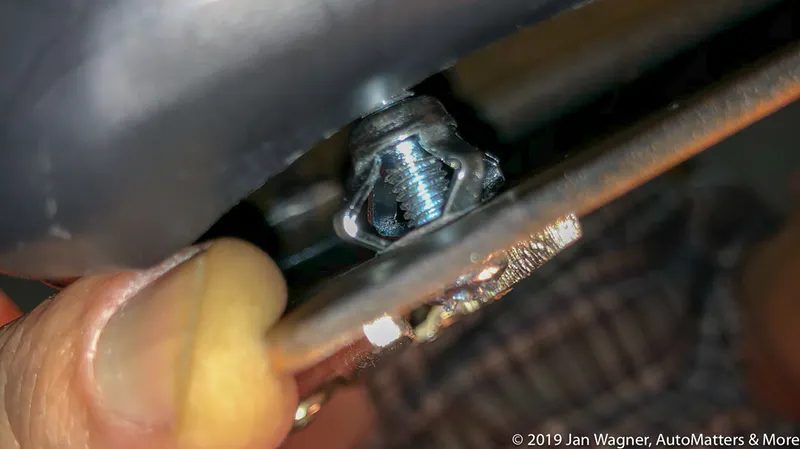
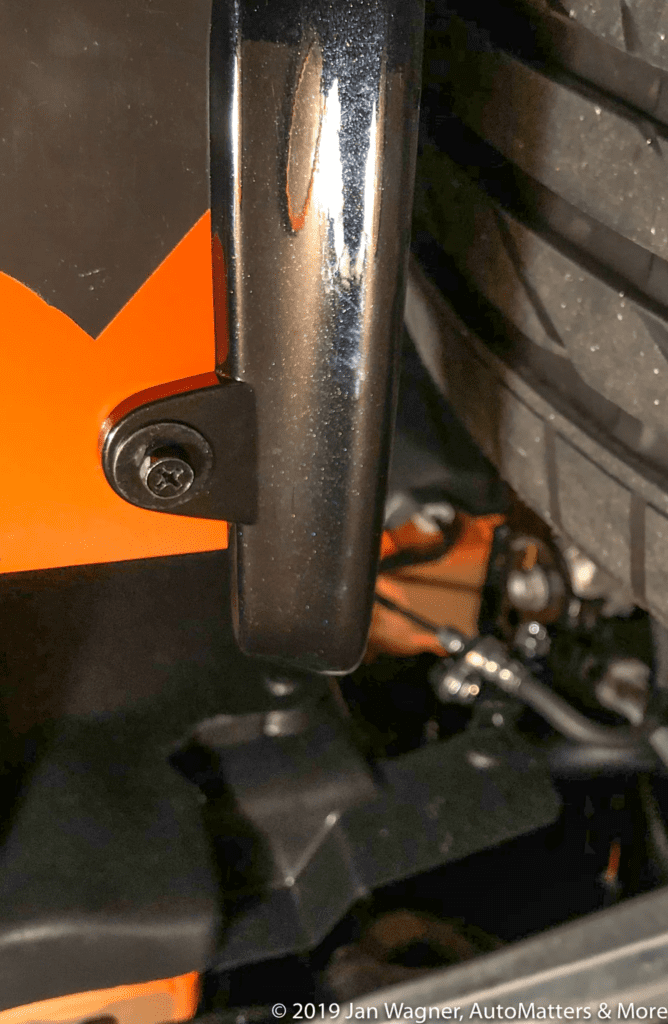
The biggest problem that I had was installing the jack nuts, which are sort of like wall anchors that you push through a hole in the drywall, and then tighten to the drywall by turning a screw. The problem with the jack nuts was that they were to be installed on a relatively thin sheet of plastic. Without the proper tool, they would just spin in the to-be-drilled hole if I tried to tighten them down onto the backside of the plastic. Undeterred, I used a pair of needle-nose Vise Grips to hold the face of the fastener while I tightened a metric machine screw (that I also had to get).
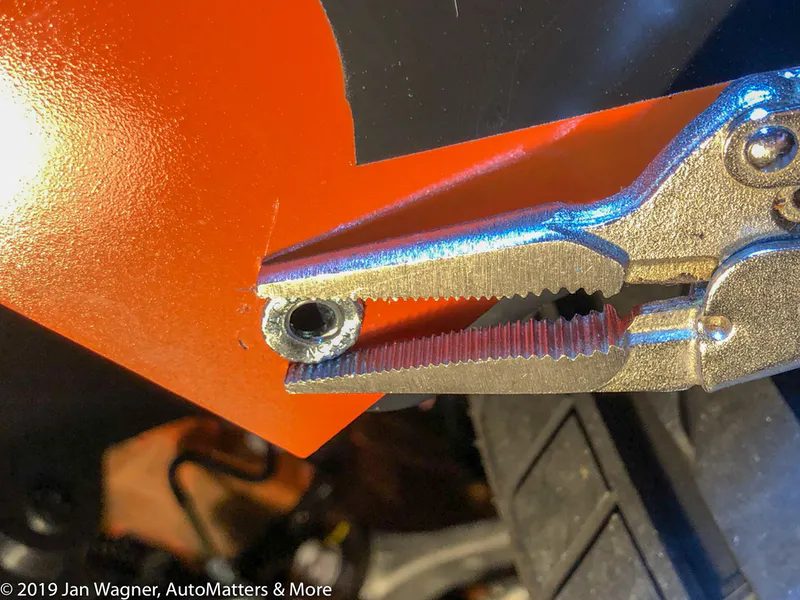
It was very hard to turn the screw, and the Vise Grips had trouble gripping the round face of the fastener, but eventually I succeeded.

Between running around looking for tools, doing research on the Internet and working under my car without the benefit of a hoist, this ‘simple’ job ended up taking me until almost 7 a.m. You might want to consider my experience when considering working on your car.
For the reat mudflaps on my nd2 it took me around 15 mins for each side. The front wasn’t too difficult, and I scrapped the jack nut and used a nut and washer with the included bolt with locktite for the underside attachement. That took me around the same amount of time per side.
I’m glad that worked out well for you.
Jan